How to start a candle business in the UK
Table of Contents
Starting a candle business could be an excellent way to make money for a craft you enjoy. This guide will tell you everything you need to know to set up a candle business in the UK.
We’ll cover the following:
- How to start a candle business in the UK
- Steps and tasks you need to complete to set up your company
- How to market your business
- How to invoice customers for your products
- How Countingup can help you manage your finances
How to start a candle business in the UK
Cover your legal bases
When starting a candle-making business, the first thing you need to do is make sure your products are safe. Here are some laws to consider:
General Product Safety Regulation
While there are no specific legal requirements for selling candles in the UK, you still need to ensure your business complies with the General Product Safety Regulation 2005. The law isn’t specific about candles but includes standards and recommendations on candle safety you need to be aware of.
Companies Act 2006
Another legislation you need to consider is the Companies Act 2006. Under law, customers need to be made aware of who they’re buying from. This means you’re legally obligated to provide the following:
- Business name
- Legal ownership name (who owns the business)
- Business address
You must include this information on all your business documents, including invoices and email correspondence. Having this information provides protection for your customers.
Additionally, you should also include the following information on your website (we’ll get into your website in more details later):
- Your business’ geographical address
- Your British Candlemakers Federation membership
- Email address
- VAT number
Protect yourself with insurance
It’s important to make sure your business is protected in case something happens. Whether you run a craft stall, a small shop, or sell your products on Etsy, Amazon or eBay, customers expect your candles to be safe.
In case the worst should happen, and a fire happens that a customer claims was caused by your candles, insurance can save your business from losing lots of money.
You can select from a range of covers, such as:
- Public liability insurance – in case a member of the public gets injured, for example, by tripping in your shop.
- Product liability insurance – in case your candles cause injury or financial loss, for example, if they accidentally contain hazardous ingredients.
- Stock insurance – this insurance protects the products you store in case they break, for example, if someone knocks them off a shelf.
Choose your business name
When starting a business, you need to give it a name that helps people find and recognise your brand. Choosing a name can be daunting, but the most important thing is to find one that represents your business and your craft. It’s best to avoid complicated, hard to spell words. Instead, go for something simple and clear.
You can use the Companies House name availability checker and trademark portal to make sure the name you’ve chosen isn’t taken. Once you’ve chosen your name, you need to register it with Companies House via either the online portal or postal application. If you run your business as a freelancer, you don’t have to register your name.
Find your niche
To find a way to set your business apart from your competitors, choose a specialism (also called a niche) to focus your candle-making efforts on and who your ideal customer is.
For example, do you want to sell luxury candles using only the best materials or aromatherapy candles to help with stress? Perhaps you want to make eco-friendly candles to help the environment? Think about who would buy these products and how you can get their attention.
It’s also a good idea to research your competitors to see what they’re doing and if there are any gaps in the market your business can fill.
Create a business plan and budget
You can think of a business plan as the roadmap or GPS to your business venture: you can start without one but will likely get lost along the way. Creating a clear business plan will help you understand where you want to go and how you’re going to get there. We’ve put together a free business plan template to help get you on your way.
One important part of any business plan is a budget for how you’ll manage different costs you’ll incur when starting your candle company. When working out your budget, consider aspects like:
- Set-up costs (including equipment and supplies)
- How much time it takes to make your candles
- Mow much each candle costs you to make
- Whether you’ll sell them from a shop, a craft stand, or online
Setting up a candle business doesn’t have to be expensive. If you sell your products online, you may only need to pay something like £50 for materials and tools.
Choose the right supplies
A crucial part of any candle-making business is to find the right supplies to make your products. You’ll probably need the following supplies and equipment to make your candles:
- Candle wax – you could either use soy wax, paraffin wax, beeswax, coconut wax, or perhaps a combination?
- Candle wicks – these are usually made with braided cotton or paper
- Scents – you can choose from a mix of organic and synthetic fragrances
- Dyes – there are liquid or powdered dyes that you can add to your melted wax
- Moulds – you might need these to create different candle shapes. These come in all shapes and sizes, or you can make your own.
- Candle glasses – you can use these instead of moulds if you prefer
- Thermometer – you need this to make sure your wax doesn’t heat above 80°C
- Saucepan and heat proof bowl – for melting your wax
- Packaging – you’ll need to think about how you’ll package your candles and get branded labels and gift boxes.
Start marketing your business
Next, you need to find customers to sell your candles to. Creating a marketing strategy will allow you to determine how you’ll find and attract your ideal customers. Here are a few methods you can use:
Set up a website
Create and maintain a professional website where customers can browse your product range and buy your candles. Website builders like WordPress, Wix, or Squarespace have templates you can use to set it up for free or at a reasonable price. Make the site easy to use and include your contact information in case customers have questions.
Use social media
Social media is great for finding customers. You can use social media platforms to look for jobs, join groups, connect with potential customers, and share pictures of your candles to promote your skills. You can also share video snippets of how you make your candles to spark peoples’ interest.
Join an online marketplace
You can sell your products online through marketplaces like Amazon or Etsy. With marketplaces increasing in popularity, most platforms will go to great lengths to make it as easy as possible to buy and sell products. You can also pay to market your products on these platforms to get in front of prospective buyers.
Use your existing network
You’ll also want to spread the word to your existing network of friends, family, former colleagues, schoolmates, and so on. These people will have their own networks of people they could recommend you to. Reach out and ask if they know of any opportunities.
How to make and send an invoice to customers
If you sign up to Amazon, Etsy, or another marketplace, these platforms will have embedded systems for sending and receiving payments. But most businesses will need to send out invoices at some point. That’s why we’ve listed the steps you need to follow to create professional invoices.
Step 1: Make it clear and professional
The first step is to make your invoice look professional and ensure it clearly lists your business information. Include your business name (even if it’s just your own name), address, company phone number, and email address.
A great way to give your invoices a professional touch is to include your logo (if you have one) in the header and design it using your company’s colour scheme. If you don’t have a colour scheme, pick colours that you feel represent your brand and use those for future invoices.
You should also make sure it’s clear that the document is an invoice. Simply adding the word ‘invoice’ at the top of your document is usually enough.
Step 2: Add a unique identification number
You need to assign each invoice a unique identification number (UIN) to keep track of them and make sure you don’t create any duplicates. A UIN is a requirement from HMRC on self-employed invoicing, so you must keep a record for tax purposes.
How you choose to number your invoices is up to you. For example, you can use numbers to keep invoices apart and add letters to separate your different customers. So if you’re sending your seventh invoice to a client named John Smith, the UIN could be ‘JS07’ or ‘JS-07’.
Choose a numbering system that works for you, and stay consistent to avoid confusion.
Step 3: Include your client’s information
Next, you need to make sure you’ve listed your customer’s information. Include their:
- Name
- Address
- Phone number
- Email address
Step 4: Specify your payment terms
Specifying how you want to get paid is one of the most important steps when creating invoices. It’s common for freelancers and small businesses to use a 30-day billing cycle, meaning the customer has 30 days from the day of purchase to pay for the candles.
Make sure you include payment methods you accept, such as debit or credit card, PayPal, Klarna, bank transfer, and so on. If you choose to charge late fees, make it clear when and how you will charge your customers.
Step 5: Describe the goods or services you provided
Make your invoice as clear as possible by including a detailed list of the candle products you sold, organised by item type. The descriptions don’t have to be long but make them detailed enough for your customers to know what they’re paying for.
The easiest way to organise the items could be in a table that includes:
- Services provided and products sold
- Date
- Quantity or hours
- Rate or price
- Total amount
- If applicable, include the VAT amount too.
Note that VAT invoices need more information, including:
- Your VAT registration number
- The tax point (when you sold the product or carried out the service) if it’s different from the invoice date
- VAT rate and total VAT charged
- If different items have different VAT rates, show this for each one
Step 6: Additional notes
While this final step is not necessary, including a short thank you note at the end of your invoice adds a personal and friendly touch. It could help you stand out from other plain invoices your customer might receive.
Step 7: Send the invoice
The quickest and easiest way to send your invoices is by email, attaching the invoice as a PDF (uneditable to prevent fraud). Write a brief description of your business and invoice in the subject line and email text.
Keep in mind that different customers might have varying procedures for processing invoices. It’s good practice to check with them and decide on a method they prefer.
After you’ve sent an invoice, you could give your customer a phone call to see if they received it and nudge them if they delay the payment. Countingup has an embedded feature that notifies you about unpaid invoices, so you never miss a payment.
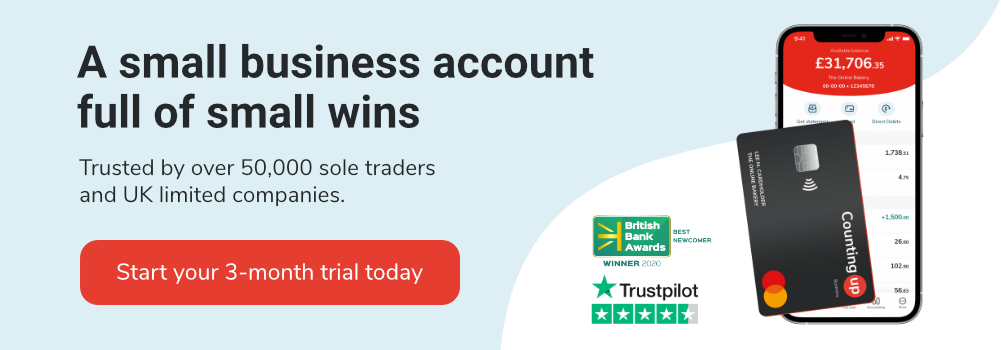
Give your business the best start with a simple app
When you’re starting your own business, it’s important to keep your personal and business finances separate from day one – to save yourself from time-consuming admin headaches further down the line.
That’s why thousands of business owners across the UK are using the Countingup app to keep on top of their financial admin. It’s the business current account and accounting software in one app. And it automates time-consuming bookkeeping admin for self-employed people across the UK.
With instant invoicing tools, automatic expense categorisation, receipt capture tools and cash flow insights, you can confidently keep on top of your business finances and save yourself hours of accounting admin, so you can focus on doing what you do best. Find out more here.